Ever wondered how to create the perfect outdoor sanctuary without breaking the bank? Well, buckle up because we're diving headfirst into the world of DIY wheeled patio privacy walls. These bad boys aren’t just trendy; they’re practical, customizable, and a game-changer for anyone looking to enhance their outdoor space. Whether you’re dealing with nosy neighbors or simply want to add a touch of privacy to your patio, this project has got your back. So, grab your tools and let’s get started!
Imagine having a movable wall that not only offers privacy but also doubles as a decorative piece. That’s right—your patio can now have its own personality, and it doesn’t have to be stuck in one place forever. With a wheeled privacy wall, you have the freedom to rearrange your space whenever the mood strikes. It’s like having a blank canvas that you can paint over and over again.
But hold up—before we dive into the nitty-gritty of building your very own wheeled patio privacy wall, let’s take a moment to understand why this project is worth your time. Privacy is a luxury these days, and who wouldn’t want a little more of it? Plus, it’s a fantastic way to showcase your creativity and DIY skills. So, without further ado, let’s explore everything you need to know about creating your dream patio space.
Read also:Elaine Dratch The Woman Behind The Laughter
Why DIY Wheeled Patio Privacy Walls Are the Future
In today’s fast-paced world, having a personal space to unwind is more important than ever. And what better way to achieve that than by adding a DIY wheeled patio privacy wall? These walls are not just about privacy—they’re about versatility, style, and functionality. You can move them around to create different layouts, block unwanted views, or even use them as planters. The possibilities are endless!
One of the biggest advantages of a wheeled privacy wall is its adaptability. Unlike traditional walls, you don’t have to commit to a permanent structure. Feeling like a change? Just roll it to a new spot. Need more space for a party? No problem—these walls can be easily rearranged to accommodate your needs. It’s like having a Swiss Army knife for your patio.
The Benefits of a Wheeled Privacy Wall
- Privacy: Keep prying eyes at bay while enjoying your outdoor space.
- Flexibility: Move the wall wherever you need it—no permanent installation required.
- Customization: Paint it, decorate it, or turn it into a vertical garden. The choice is yours!
- Affordability: Building one yourself is way cheaper than buying a pre-made solution.
Getting Started: Tools and Materials You’ll Need
Before you dive into the construction process, it’s important to gather all the necessary tools and materials. Having everything ready will save you time and frustration in the long run. Here’s a quick rundown of what you’ll need:
- Wooden planks (cedar or redwood works great for outdoor use)
- Casters (wheels with swivel brackets)
- Screws and nails
- Drill and screwdriver
- Measuring tape
- Saw (hand saw or power saw)
- Sandpaper
- Paint or stain (optional)
Now, you might be thinking, “Do I really need all this stuff?” The answer is yes—and no. If you’re on a tight budget, you can always scale back on some of the extras, like paint or decorative elements. But trust me, investing in quality materials will pay off in the long run. Your wall will last longer and look better, which is always a win-win.
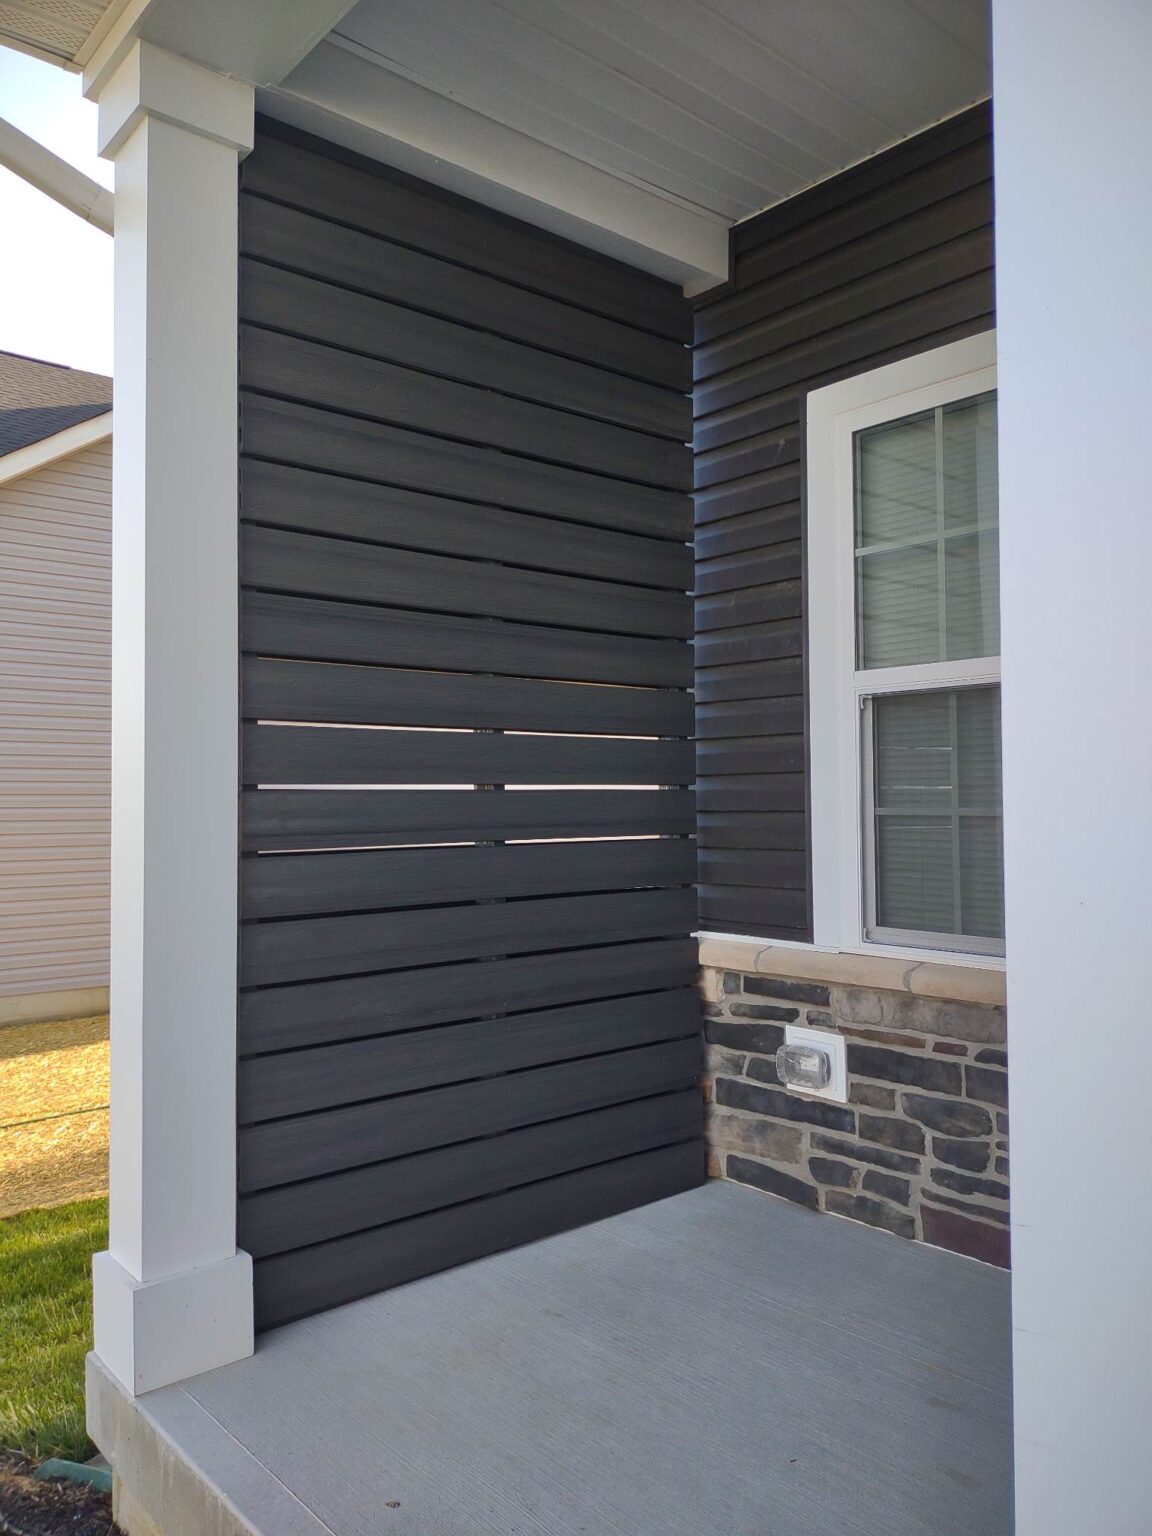
Choosing the Right Materials
When it comes to materials, don’t skimp on quality. Sure, cheaper options might seem tempting, but they’ll likely degrade faster and require more maintenance. Cedar and redwood are excellent choices because they’re naturally resistant to rot and insects. Plus, they have that warm, rustic look that pairs perfectly with any outdoor decor.
As for the wheels, make sure you choose ones with swivel brackets. This will allow you to move the wall in any direction without any hassle. And if you plan on adding heavy decorations or plants, consider using heavier-duty casters to support the weight.
Read also:Unveiling The Charm Of Antique Mercantile Jackson Mi
Step-by-Step Guide to Building Your Wheeled Privacy Wall
Alright, let’s get down to business. Building a wheeled patio privacy wall isn’t as complicated as it sounds. With a little patience and some elbow grease, you’ll have your very own masterpiece in no time. Follow these steps, and you’ll be good to go:
Step 1: Measure and Plan
Start by measuring the space where you plan to place your wall. This will help you determine the size and dimensions. Once you have your measurements, sketch out a basic design. Don’t worry about being an artist—stick figures and rough outlines will do just fine.
Step 2: Cut the Wood
Using your saw, cut the wooden planks according to your measurements. If you’re not comfortable cutting wood, most hardware stores offer cutting services for a small fee. It’s a great option if you want to save time and avoid any accidents.
Step 3: Assemble the Frame
Now it’s time to assemble the frame. Use screws and nails to secure the pieces together. Make sure everything is square and level before moving on to the next step. This is crucial for stability, so take your time and double-check your work.
Step 4: Attach the Wheels
Once the frame is assembled, it’s time to add the wheels. Attach the casters to the bottom of the wall using screws. Make sure they’re securely fastened—you don’t want your wall rolling away unexpectedly!
Step 5: Sand and Finish
Before you call it a day, give your wall a good sanding to smooth out any rough edges. This will prevent splinters and make your wall look more polished. If you want to add a personal touch, now’s the time to paint or stain it. Let your creativity shine!
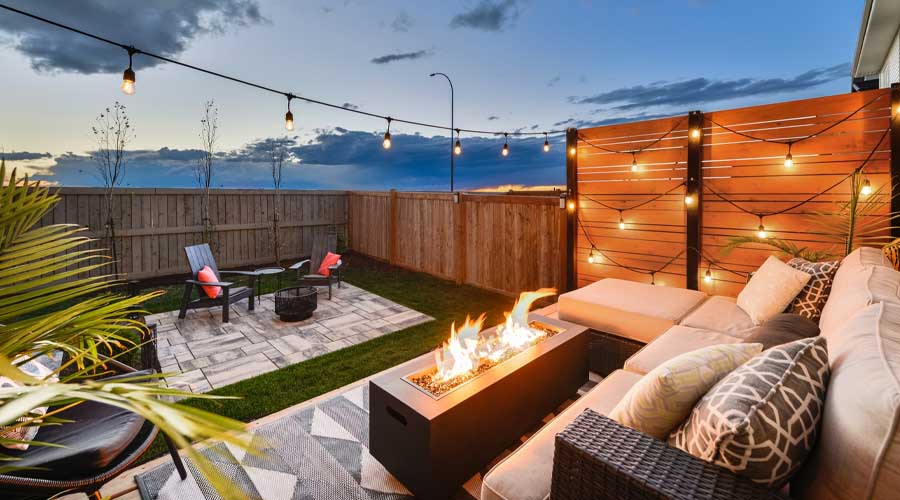
Design Ideas and Inspiration
Now that you’ve built your wheeled patio privacy wall, it’s time to think about how you want to style it. The beauty of this project is that it’s completely customizable. Here are a few ideas to get you started:
- Turn it into a vertical garden by adding planters or hooks for hanging plants.
- Paint it in bold colors to make a statement in your outdoor space.
- Add shelves or hooks for storing outdoor essentials like gardening tools or cushions.
- Decorate it with string lights or fairy lights for a cozy, inviting vibe.
The key is to have fun with it. Your wall doesn’t have to be perfect—it just has to reflect your personal style and make you happy. And who knows? You might even inspire your neighbors to take on their own DIY projects.
Tips for Decorating Your Wall
When it comes to decorating, less is often more. Don’t overcrowd your wall with too many elements—stick to a few key pieces that complement your overall aesthetic. And remember, you can always change things up whenever you feel like it. That’s the beauty of a wheeled privacy wall—it’s as flexible as your imagination.
Maintenance and Care
Like any outdoor project, your wheeled patio privacy wall will require some maintenance to keep it looking its best. Here are a few tips to help you keep it in tip-top shape:
- Regularly inspect the wheels for wear and tear, and replace them if necessary.
- Reapply paint or stain every few years to protect the wood from the elements.
- Keep the wall clean by wiping it down with a damp cloth or hose.
- Store it in a dry place during the winter months to prevent damage from harsh weather.
By following these simple steps, you can ensure that your wall stays functional and beautiful for years to come.
Common Issues and Solutions
Even the best-laid plans can sometimes go awry. If you encounter any issues with your wall, don’t panic. Here are a few common problems and how to fix them:
- Wobbly wheels: Tighten the screws or replace the casters if they’re worn out.
- Cracked wood: Apply a wood sealant to prevent further damage.
- Fading paint: Sand down the affected areas and repaint as needed.
Cost Comparison: DIY vs. Pre-Made Options
One of the biggest advantages of a DIY wheeled patio privacy wall is the cost savings. Pre-made options can be expensive, and they often lack the customization options that a DIY project offers. Here’s a quick breakdown of the costs:
- DIY: $100-$200 (depending on materials and tools)
- Pre-made: $300-$500+ (depending on size and quality)
As you can see, building your own wall is not only cheaper but also more rewarding. Plus, you’ll have the satisfaction of knowing that you created something truly unique.
Saving Money Without Sacrificing Quality
If you’re on a tight budget, there are still ways to save money without sacrificing quality. Look for sales at your local hardware store, or consider using reclaimed wood for a rustic look. And don’t forget to shop around for the best prices on casters and other materials.
Final Thoughts and Call to Action
So there you have it—everything you need to know about creating your very own DIY wheeled patio privacy wall. From choosing the right materials to assembling the frame, this project is both rewarding and fun. And the best part? You get to customize it to fit your unique style and needs.
Now it’s your turn to take action. Grab your tools, gather your materials, and get started on your dream patio space. And don’t forget to share your progress with us in the comments below. We’d love to see what you come up with!
Until next time, happy building!
Table of Contents
- Why DIY Wheeled Patio Privacy Walls Are the Future
- The Benefits of a Wheeled Privacy Wall
- Getting Started: Tools and Materials You’ll Need
- Choosing the Right Materials
- Step-by-Step Guide to Building Your Wheeled Privacy Wall
- Step 1: Measure and Plan
- Step 2: Cut the Wood
- Step 3: Assemble the Frame
- Step 4: Attach the Wheels
- Step 5: Sand and Finish
- Design Ideas and Inspiration
- Tips for Decorating Your Wall
- Maintenance and Care
- Common Issues and Solutions
- Cost Comparison: DIY vs. Pre-Made Options
- Saving Money Without Sacrificing Quality
- Final Thoughts and Call to Action